
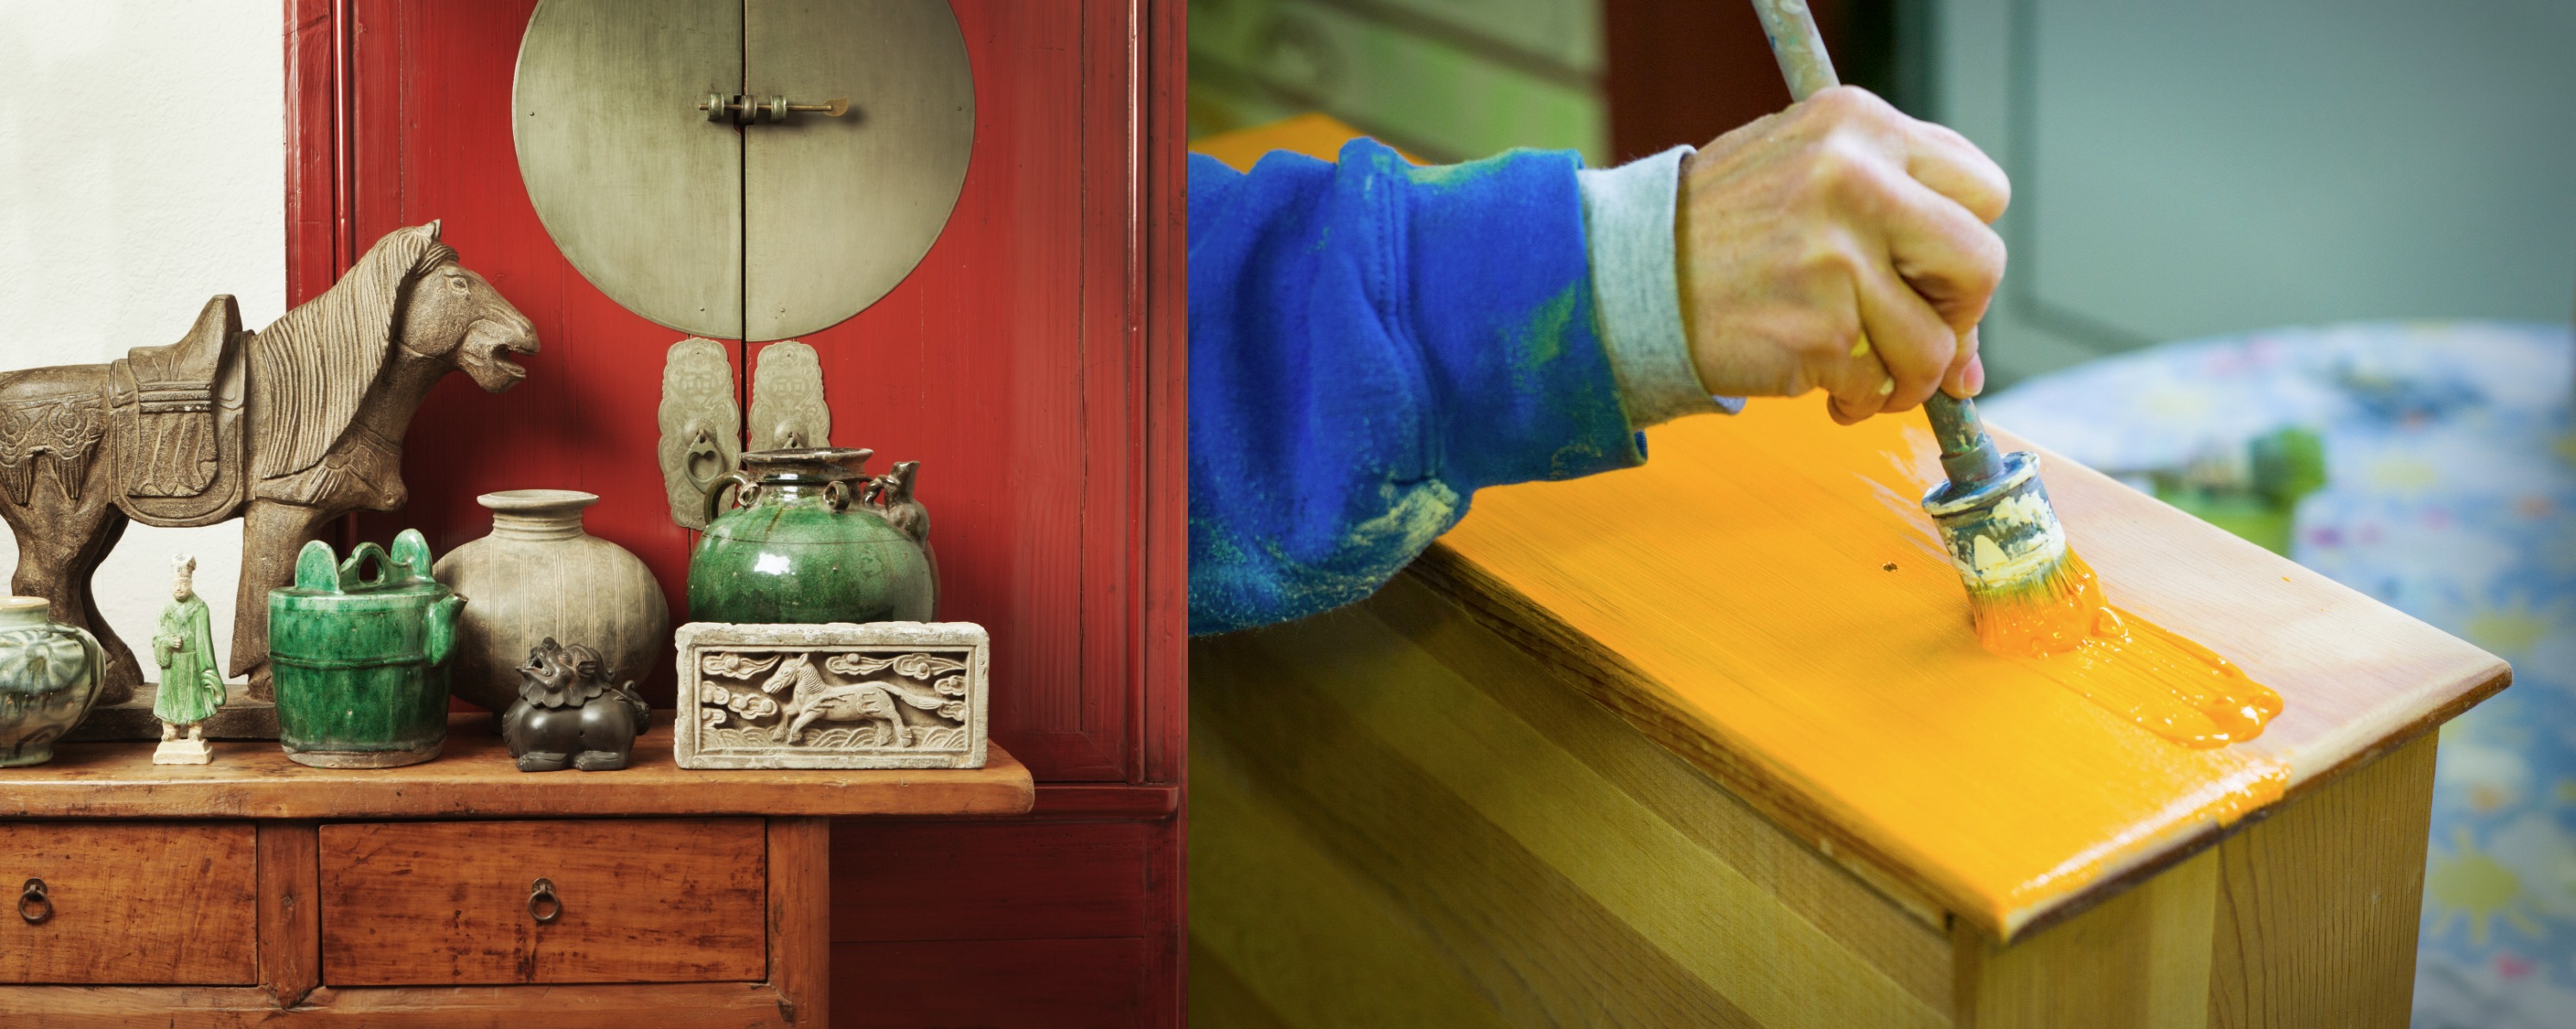
Want to give an old coffee table a splash of colour or perk up a sideboard? Here’s what you need to know…
Step 1: Prep
● The best thing is to move the furniture you want to paint outside. If it can’t be moved, make sure that you put down a large drop cloth and open all the windows for ventilation.
● Wear old, comfortable clothes that you don’t mind getting paint splatters on. And wear gloves to protect your hands.
● Dismantle the piece if necessary. Remove any loose parts, like drawers, and unscrew knobs, handles and hinges (you don’t want to risk painting over them).
● Is there any existing paint you need to remove? The rule here is that if the current finish isn’t cracked or peeling, it will most likely be fine to paint over it. If the paint has started to crack and peel though, rather remove it by sanding it down.
● Sanding helps new paint have something to grip onto by giving the surface a bit of texture. Use sand paper pads, with a grit of 80 or 100 (the higher the grit number, the smoother the sandpaper). Don’t forget to sand the edges and corners and to sand away any water marks, etc.
● If your furniture has any imperfections such as dents and scratches, apply a little wood filler. Don’t worry if you apply too much – you can always remove it by sanding it down.
● Wipe away the sanding dust with a cloth or use your vacuum cleaner to ensure that your furniture is completely dust free before painting.
Step 2: Paint
● Start by applying a multi-surface primer or universal undercoat. Use a brush-on versus a spray-based primer to get full and even coverage. Allow it to dry completely before continuing.
● Paint usually goes far when working with furniture so you don’t have to buy a lot – 1-litre tins are usually ideal. If the type of paint is unclear on the tin, look at the cleaning instructions on the label. Water is required for cleaning a water-based paint, while turps is needed for oil-based paint.
● Use a small foam roller when painting. It gives a neat, thin layer and a smoother finish than the ‘shaggier’ rollers which tend to spray paint in all directions.
● Work in a systematic fashion, from one side to the other, so that you cover the entire area with an even coat.
● Small artists’ brushes with a soft bristles work well for corners and grooves and harder-to-reach places.
● Allow oil-based paints, like enamel, to dry overnight between coats.
● Allow water-based paints like PVA to dry to the touch (or up to 2 hours).
● Sand lightly between coats (except for the final coat).
Step 3: Seal
● Once the painting is done, you’ll want to protect all your hard work by applying a sealer or top coat. This will help protect the paint job going forward.
● Good-quality enamel paints don’t need to be sealed as they hold up very well to cleaning and wiping without chipping, etc. PVA, on the other hand, is very absorbent and needs to be sealed.
● Sealers come in different finishes (matte, sheen or gloss) and in several colours too.
● When you seal sanded wood with clear sealer, it darkens and brightens the colour.
● Always seal pine – it is very porous.
● Always seal kitchen cupboards, no matter what kind of paint you use.
More hints and tips
● Worried that you’re about to ruin a valuable antique? Furniture and/or collectibles are considered antiques only once they are 100 years old or more. If you’re unsure, rather have the piece appraised by an expert.
● Don’t skimp on the sanding. The last thing you want is to go through all the hard work of painting your furniture only to find that it’s uneven or later starts to chip.
● Many sealants yellow over time. Woodoc 5 Indoor Polywax Sealer and Plascon Waterbased Glazecoat are both great ‘non-yellowing’ choices.
● Clean dried paint splatters off of glass or granite using a blade or scraper.
● Use Tabasco Sauce to shine tarnished copper.
● Don’t be afraid to call the helplines listed on the products you use if you have a question – there is usually a well-informed person on the other side.
● Don’t paint a water-based paint over an oil-based paint – it won’t stick and will flake off.
● Take care if you plan to completely strip a piece of furniture using paint remover. Use protective gloves and apply the paint remover outside as it’s highly corrosive. The thicker the paint remover is applied, the more it erodes. Wash the piece down with soapy water to remove any leftover remover before sealing.
● Don’t forget to take ‘before’ and ‘after’ pictures of your handiwork!
With thanks to Johannesburg-based freelance artist and interior decorator Zilla Hinckley for contributing to this article: “I love what paint can do; a fresh coat of paint can transform anything.”


Leave a Comment